I have been a fan of weather and storm watching since I was a little kid. It really all started one night when I was in bed in the midst of a wild thunderstorm. I was awake and frightened and thought everyone else was asleep. I heard a noise, and as kids do when they can’t sleep, I went in search of what I was hearing. It was my grandmother. She was standing by the sliding glass window watching out across the lake. I went and stood next to her. I told her that the storm was scaring me. I asked if it was scaring her. She said no. She explained how she loved to watch the storms. We sat there together not really saying a whole lot, just watching the storm. Occasionally we would comment about the lightning or thunder hits. I forgot to be scared. It turned out that I wasn’t. I was amazed.
I have been in many storms since. I have been closer to tornadoes that I would have liked. But all in all, I am still fascinated by the storms. Since I started learning about the mircocontrollers, one of the earliest ideas I had was that I could somehow use one to measure the weather. Early on I did not know how to go about it. But as I have been exploring new areas of technology, as well as learning to build, building, and crafting new things I am starting to understand more and more what can go together. It is somewhat freeing actually.
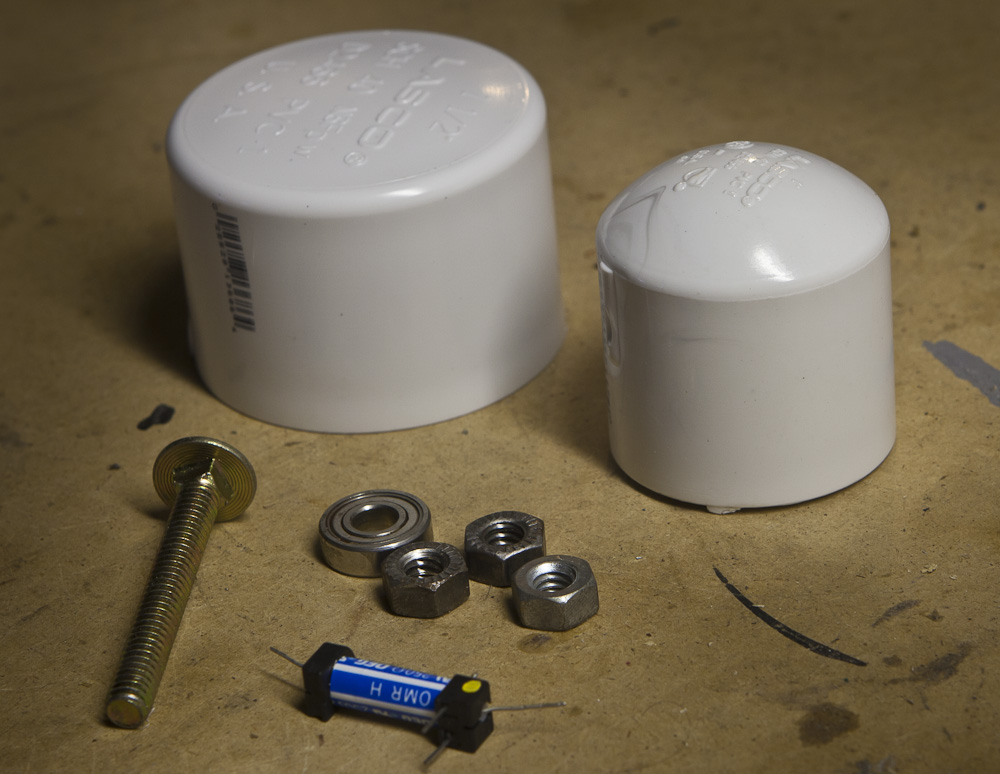
So, weather. Where to begin. Starting with my most basic needs, I need to know how fast the wind is going and from what direction. I decided that I wanted to build an anemometer. There are several folks on the web who have built them, but true to form, I did not see one that sort of suited me. (What can I say, I like making my own stuff). So, I started to play with different ideas. I still had several skateboard wheel bearings from the windmill, but I have found that those will rust when exposed directly to the elements. I could use them, but they would need to be shielded. I wanted to integrate electronics so I could measure the speed. I wanted it to be cheap. I wanted it to be repeatable in case I wanted to do it again.
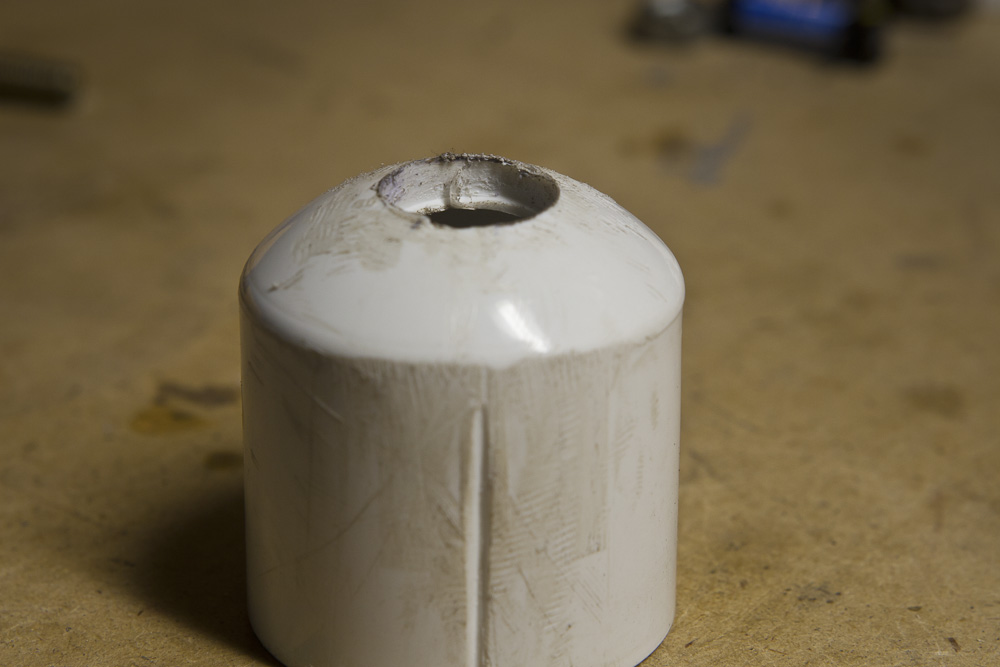
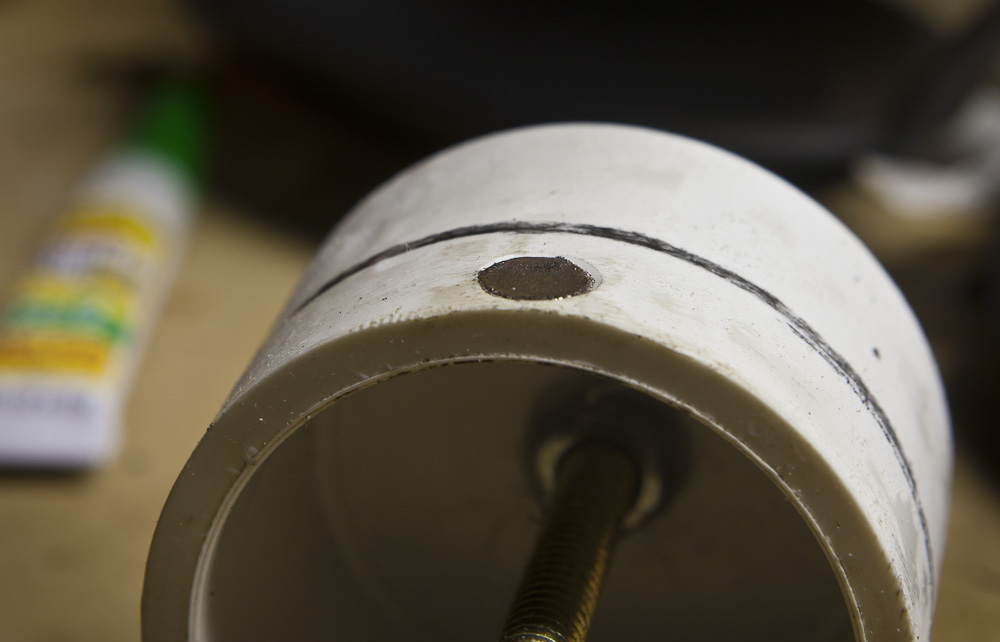
 PVC is a great, low cost, experimental building material. It can be cut, shaped, sanded, and painted and put together in countless ways. It’s like Legos for Adults. The way I decided to approach it was to have a cap suspended on top of a smaller cap. The outer cap would need to freely rotate, yet stay connected to the inner cap. An issue I ran into was how to drill a hole in the exact middle of the pvc cap. I have no good scientific answer. I used a ruler and marked lines across the dome. I kept doing this from many angles till one spot showed it’s self as the center. I used a 1/4 2 inch brass bolt. I used brass as this is what they use in toilets and figured it would be outside.
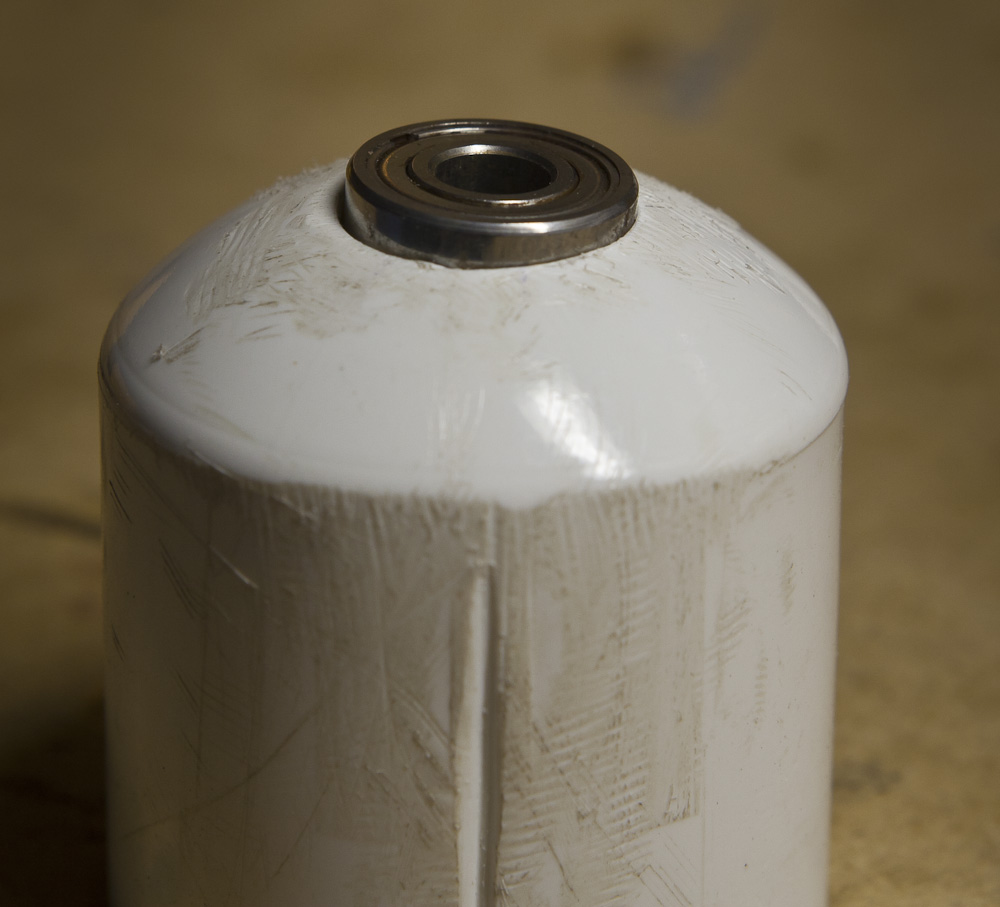
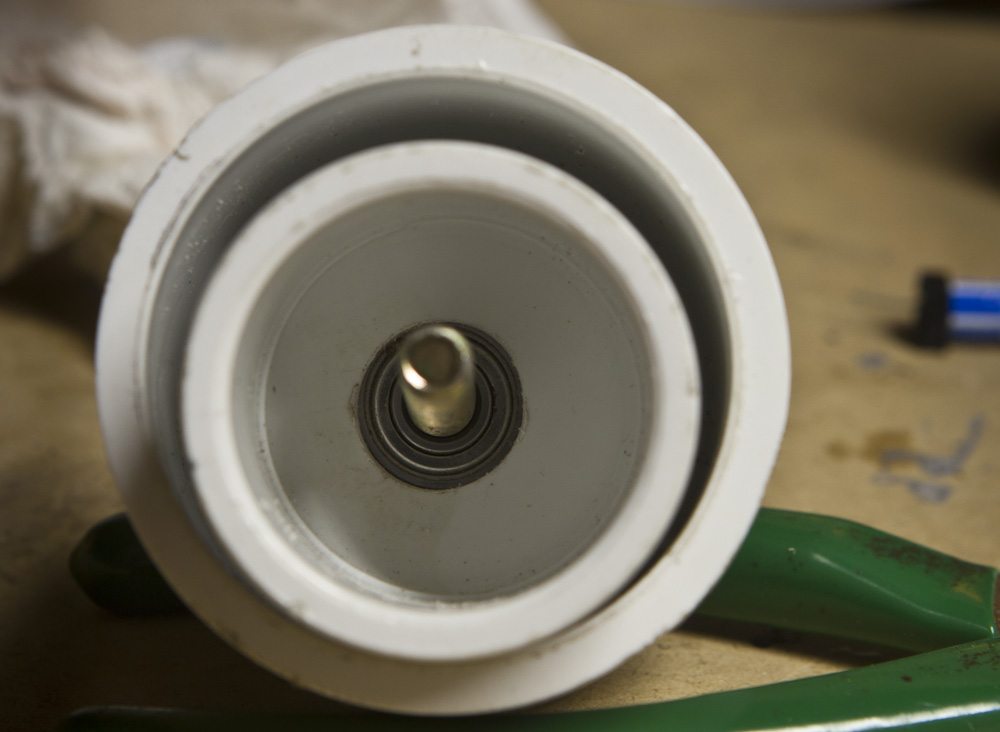
 The bolt was put through the end of the cap and nut tightened in place. Before I get too much farther, I should mention that I fit everything together to make sure it all worked then went back and epoxied all the non moving bits. I drilled a hole in the middle of the smaller cap and widened the hole until the ball bearings fit snugly inside. I put the outer cap over the inner cap and added another nut to the inside of the smaller cap to hold the two caps together. The 2 nuts sit directly on the inner rim and not the sleeve of the bearing. Being that the outer rim is firmly attached to the smaller cap, the inner rim spins freely. BTW, something that I did not take into consideration was how to hold the nut as I was tightening it. There is no room for fingers in that small of a space. Needle nose pliers helped out here, but it still was not easy. If you are asking why, remember that the tighter that the nut gets, the further down the large cap gets, which means you have nothing to grip onto after a while because the outer rim spins.

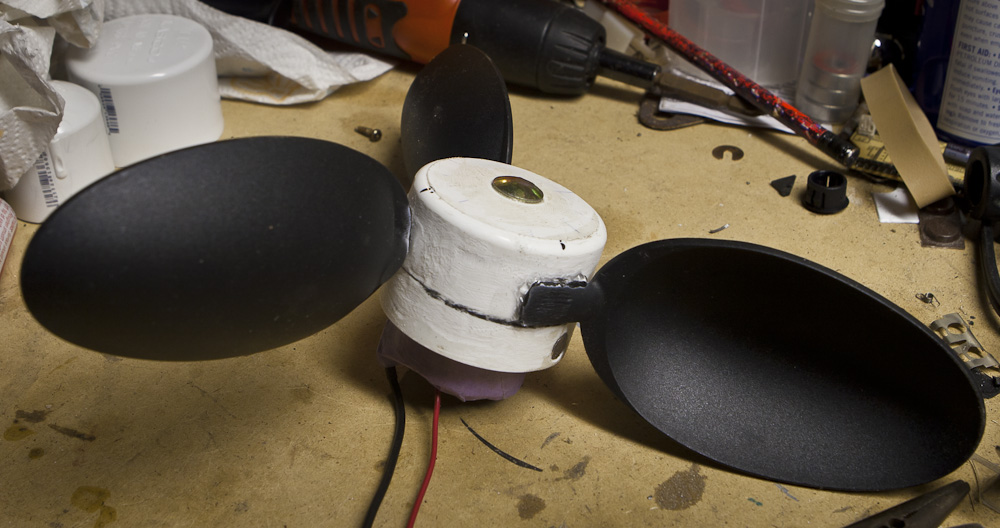
The next issue I needed to figure out was the scoops. I have seen all sorts of ideas ranging from as simple as easter egg cups to folks who have custom machined their own. I wanted something bigger than easter egg shells and far less complex than machining. I could use a makerbot and make whatever shape I wanted, if I had one (Man oh man, I want a makerbot). One day when trolling the dollar store (a good source for budget makers) I saw a huge display of big plastic spoons. After being an ass and asking how much they cost, I bought 4 of em’. I bought 3 for the build and one to goof up. Not long later, I had the handles removed and ready to attach.
 I used super glue at first, but it really did not work well. Epoxy eventually was the right solution. But how does one hold a salad spoon to a round spinable object until it hardens in place? You get comfortable because you are not going any place for a while. With all the goofy angles, there was not a good way to clamp it. Fortunately is was 5 min. epoxy.

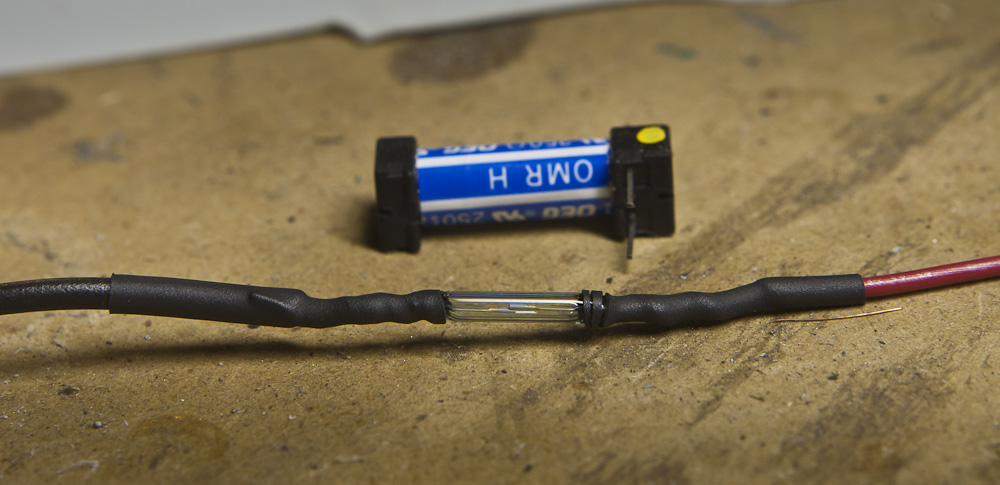
For the electrical part of this, I took apart a relay I had in my kit o goodies. If you gently pull on one of the ends of this variety, the glass reeded vial will come out fairly easily. I soldered wires to the leads and covered them in heat shrink to keep the water out. I epoxied the reed to a groove I made on the outside of the inside cap. (clear as mud?) I drilled a hole in the side of the bigger cap just big enough to push a little magnet into. The magnet trips the reed which gives you your pulse for your uC (microcontroller).
The wind vane was dome somewhat similar. But, to make the assembly a little easier (which occurred to me after putting together the anemometer, I bolted in reverse this time. I had the bolt come out of the top of the big cap. Something I did not realize when I started on the arrowish part of the vane was that the 2 sides had to be of equal weight. Who knew. I cut it all out and epoxied it to the cap. It was locked in and when I went to test it, it sort of lazily flopped around, but did not really head into the wind as I had expected. I am writing this some time afterwards and seriously have no idea how I solved this one, but I found that balance was the key. I some metal bits, but it was not enough. I started looking for small, really heavy stuff so I could balance the thing. I remembered the fishing weights we had used for the pinewood derby cars. I cut a slit down the middle of a large weight and epoxied it in place. The vane came to live. While it is ugly as hell, it effortlessly moves about when even the slightest wind is present.